

Expert Vector Image Conversion: Get Crisp, Clear Graphics
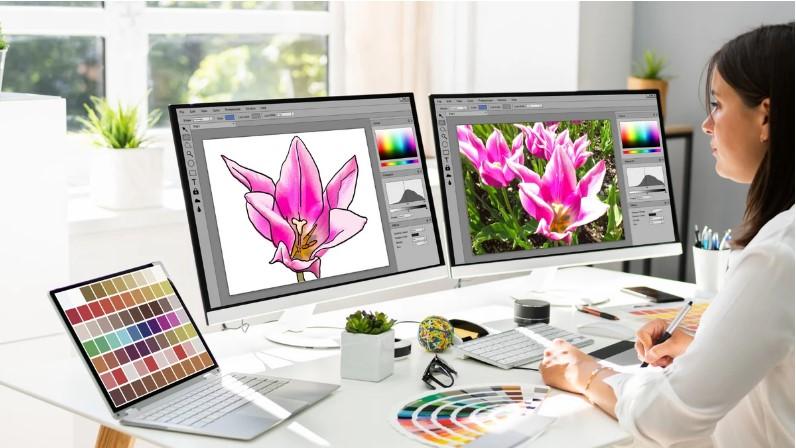
Have you ever enlarged a logo only to see its edges become blurry and uneven? This is a common problem when working with low-resolution images. It can make a business look less professional, especially when the artwork appears on banners, clothing, packaging, or marketing materials.
Expert Vector Image Conversion offers a practical solution. It transforms pixel-based images into scalable vector graphics that maintain clean edges at different sizes. With the right approach, you can use your artwork across digital platforms and printed materials without worrying about unwanted pixelation.
Whether you are a business owner, designer, online seller, or marketing professional, understanding vector conversion can help you get more value from your existing images.
What Is Expert Vector Image Conversion?
Expert Vector Image Conversion is the process of turning raster images into vector artwork or improving existing vector files for better quality and usability.
Raster images, such as JPG and PNG files, are made of tiny colored pixels. When enlarged too much, these pixels become visible and make the image look blurry.
Vector graphics work differently. They use mathematical paths, curves, points, and shapes to define artwork. This allows them to scale up or down without the typical loss of sharpness associated with raster images.
For example, a small company logo can look clear on a business card and remain sharp when printed on a large outdoor sign.
Raster Images vs. Vector Graphics
Understanding the difference between these formats helps you decide when conversion is necessary.
Raster images:
-
Made from pixels.
-
Often used for photographs and detailed digital images.
-
Can lose sharpness when enlarged beyond their original resolution.
-
Common formats include JPG, PNG, GIF, and TIFF.
Vector graphics:
-
Made from paths, curves, and geometric shapes.
-
Suitable for logos, icons, illustrations, and line artwork.
-
Can be resized without losing vector-based edge quality.
-
Common formats include SVG, EPS, AI, and vector PDF files.
Not every image needs conversion. Photographs with complex textures are usually best kept as raster images, while logos and illustrations often benefit from vector artwork.
Why Is Professional Vector Image Conversion Important?
A file may look acceptable on your screen but fail when used for large-format printing, cutting, or detailed design work. Professional conversion helps prepare artwork for its intended purpose.
Maintain Sharpness at Any Size
One of the main benefits of vector graphics is scalability. You can resize vector artwork for different applications without the pixelation that often affects raster images.
This is particularly useful when a business needs the same logo for website graphics, business cards, product labels, and large signs.
Improve Logo Quality
Logos are often used across many platforms and materials. A clean vector version helps maintain consistent shapes, proportions, and edges.
During conversion, an expert may recreate curves, refine corners, correct uneven lines, and simplify complicated areas. These changes can make the final artwork easier to use in professional design projects.
Prepare Artwork for Printing
Printers may require vector files for specific jobs, especially when working with logos, labels, signage, and other graphics that need precise edges.
Vector conversion can help create artwork suitable for the intended print process. However, color settings, transparency, fonts, and the printer's file requirements must also be checked.
Support Cutting and Engraving Projects
Vector paths are commonly used by vinyl cutters, laser engraving systems, and other equipment that follows defined lines or shapes.
A properly prepared file can help these systems interpret the artwork more accurately. Depending on the equipment, paths may need to be closed, simplified, separated, or assigned specific line settings.
How Does Expert Vector Image Conversion Work?
The conversion process depends on the source image, the complexity of the design, and the intended use. A simple icon may need only minor adjustments, while a detailed logo may require careful manual tracing.
Step 1: Review the Original Image
The first step is to examine the source artwork.
Important details include:
-
Image resolution and overall clarity.
-
Shape complexity and fine lines.
-
Number of colors.
-
Presence of gradients, shadows, or textures.
-
Intended output size and file format.
A clean source image generally makes accurate conversion easier. If the original is blurry or incomplete, some parts may need to be reconstructed manually.
Step 2: Choose the Right Conversion Method
There are two common approaches to vector conversion.
Automatic tracing uses software to detect edges, colors, and shapes. It can work well for simple icons, bold graphics, and high-contrast artwork.
Manual vector tracing involves recreating the design with paths, curves, and anchor points. It provides greater control over shape accuracy and is often useful for professional logos and detailed illustrations.
Sometimes, a combination of both methods produces the best result.
Step 3: Refine Shapes and Curves
Automatic tracing can create rough edges, too many anchor points, or unwanted shapes. These issues may become more noticeable when the artwork is enlarged.
During refinement, the designer can:
-
Smooth uneven curves.
-
Correct alignment and proportions.
-
Remove stray points and unwanted shapes.
-
Rebuild missing sections.
-
Simplify paths where necessary.
This stage helps turn a basic trace into clean, usable vector artwork.
Step 4: Adjust Colors and Details
The original image may contain many similar shades or complex color transitions. These details need careful handling during conversion.
For a simple logo, the designer may preserve a limited color palette. For a more detailed illustration, gradients and layered shapes may be needed to retain the intended appearance.
The goal is to preserve the artwork's identity without adding unnecessary complexity.
Step 5: Export the Final File
Once the artwork has been reviewed, it can be saved in a suitable vector format.
Common choices include:
-
SVG: Useful for websites, digital graphics, and many cutting workflows.
-
EPS: Often used in print and professional graphics workflows.
-
AI: An editable working format associated with vector design software.
-
Vector PDF: Useful for sharing and printing when the document contains genuine vector artwork.
Remember that changing a file extension does not convert an image into a vector. The artwork must contain actual vector paths or shapes to provide the benefits of vector graphics.
Step 6: Test the Converted Artwork
Before using the file, zoom in and inspect the paths, corners, spacing, and colors.
If the artwork will be printed, cut, or engraved, test it in the intended workflow whenever possible. A file that looks good in a design application may still need adjustments for a specific machine or production process.
Common Challenges in Vector Image Conversion
Even a good source image can present challenges during conversion. Knowing what to look for helps you avoid poor results.
Blurry or Low-Resolution Images
Low-resolution images may lack clear edges. Automatic tracing can struggle to identify the original shapes accurately.
Solution: Use the highest-quality source available. If necessary, recreate important elements manually instead of relying entirely on automatic tracing.
Too Many Anchor Points
Automatic conversion can generate hundreds of unnecessary points. This makes paths difficult to edit and may create rough curves.
Solution: Simplify the paths while preserving the original shape. Use fewer, well-placed anchor points wherever possible.
Incorrect Colors
Some tracing tools split similar shades into separate shapes or produce colors that do not match the original artwork.
Solution: Review the color palette and remove unwanted shapes. For brand artwork, use the required color values whenever they are available.
Missing Details
Thin lines, small text, and subtle features may disappear during automatic tracing.
Solution: Inspect the artwork at a larger zoom level and manually rebuild essential details. For very small elements, slight simplification may improve clarity.
Complicated Gradients and Shadows
Photographs and highly detailed illustrations can contain thousands of color transitions. Converting every detail into vector shapes may create a large, complicated file.
Solution: Consider whether full vector conversion is necessary. In some cases, a hybrid design that combines vector elements with raster images is more practical.
How to Choose the Right Vector Image Conversion Service
If your artwork is important to your business, choosing a suitable conversion service can save time and help you avoid repeated corrections.
Review Previous Work
Look for examples of converted logos, illustrations, icons, and other designs similar to your project.
Pay attention to smooth curves, clean edges, accurate proportions, and sensible use of anchor points. A polished preview should remain clean when enlarged.
Confirm the Required File Formats
Explain how you intend to use the artwork before placing an order.
For example, a website may require SVG, while a print provider may request EPS or a vector PDF. A cutting machine may have its own compatibility and path requirements.
Ask whether the final file will contain editable vector paths rather than an embedded raster image.
Ask About Manual Editing
Some designs need more than automatic tracing. If your artwork includes small text, complex curves, or a detailed logo, ask whether manual cleanup is included.
This is especially important when the source image is blurry or has an unusual background.
Check Revision Policies and Delivery Times
Before choosing a provider, confirm the expected turnaround time, revision options, and included file formats.
Share your preferred dimensions, color requirements, and intended use to reduce misunderstandings and unnecessary revisions.
Practical Tips for Better Vector Conversion Results
You can improve the final outcome by preparing your artwork carefully.
-
Provide the best source image. Use a high-resolution file or the original artwork whenever possible.
-
Remove unnecessary backgrounds. A clean image can make tracing easier, particularly for logos.
-
Identify important details. Explain which colors, shapes, and text must remain unchanged.
-
Choose a suitable output format. Consider the software, printer, or equipment that will use the file.
-
Inspect the paths. Look for stray shapes, rough curves, and overlapping elements.
-
Check text and fonts. Confirm that lettering is correct and decide whether fonts should remain editable or be converted to outlines.
-
Keep the original file. Save a separate copy before making changes.
-
Test the final design. Open the exported file in a compatible application and check its appearance at different sizes.
These simple steps can make the conversion process smoother and help you avoid common mistakes.
Who Needs Expert Vector Image Conversion?
Expert Vector Image Conversion can benefit many people and businesses that work with digital artwork.
Business Owners and Marketing Teams
Businesses need logos and graphics for websites, advertisements, packaging, business cards, and promotional materials. Vector artwork helps keep these designs consistent across different sizes and applications.
Graphic Designers
Designers often receive artwork in unsuitable formats. Converting raster images into editable vectors can make it easier to refine shapes, change colors, and prepare files for different projects.
Printing and Signage Companies
Large banners, vehicle graphics, signs, and labels often require sharp artwork. Vector files are especially useful when clean outlines and precise shapes are important.
Clothing and Custom Product Businesses
Businesses creating printed apparel, decals, patches, and personalized products may need vector artwork for production. Clean paths can help prepare designs for compatible printing, cutting, or other manufacturing processes.
Online Sellers and Content Creators
Online sellers use logos, product graphics, icons, and illustrations across websites and marketplaces. Vector versions make it easier to reuse artwork without creating a new image for every size.
Frequently Asked Questions
1. What Is Expert Vector Image Conversion?
Expert Vector Image Conversion transforms raster images or improves existing artwork to create clean, scalable vector graphics. It may involve tracing, path editing, color correction, and file preparation.
2. Can Any Image Be Converted into a Vector?
Most images can be traced or recreated as vector artwork, but not every image benefits from full conversion. Logos, icons, and illustrations are often suitable, while photographs with complex textures may be better kept as raster images.
3. Which File Format Is Best for Vector Graphics?
The best format depends on your intended use. SVG is common for web graphics, EPS is used in many print workflows, AI supports editable design work, and vector PDF is useful for sharing and printing. Always check the requirements of the receiving software or service.
4. Does Vector Conversion Improve Image Resolution?
Vector conversion replaces pixel-based artwork with scalable paths and shapes. This helps maintain clean edges when resizing, but it does not automatically restore missing details or recreate the original image perfectly.
5. How Long Does Vector Image Conversion Take?
The time required depends on the design's complexity, source quality, number of colors, and level of manual editing. A simple icon may take only a short time, while a detailed illustration or complex logo may require considerably more work.
Conclusion
Expert Vector Image Conversion helps turn ordinary pixel-based images into flexible, scalable artwork for printing, branding, web design, and production tasks. The right approach can improve edge quality, simplify editing, and make your graphics easier to reuse across different applications.
For the best results, begin with a good source image, choose the correct conversion method, refine the paths, and export the format your project requires. Do not overlook the final inspection, especially when the artwork will be printed, cut, or used for commercial purposes.
Whether you need a sharp business logo, clean product graphics, or editable illustrations, well-prepared vector artwork can help your designs look professional at almost any size.

 English
 Arabic
 French
 Spanish
 Portuguese
 Deutsch
 Turkish
 Dutch
Dutch
 Italiano
 Russian
 Romaian
 Portuguese (Brazil)