

Convert an Image to PES Embroidery Format Easily
Have you ever found a beautiful logo or image and wished you could stitch it onto a shirt, cap, bag, or jacket? Turning that idea into embroidery is easier when you understand how image conversion works. However, there is one important detail: an ordinary image file cannot usually be stitched directly by an embroidery machine.
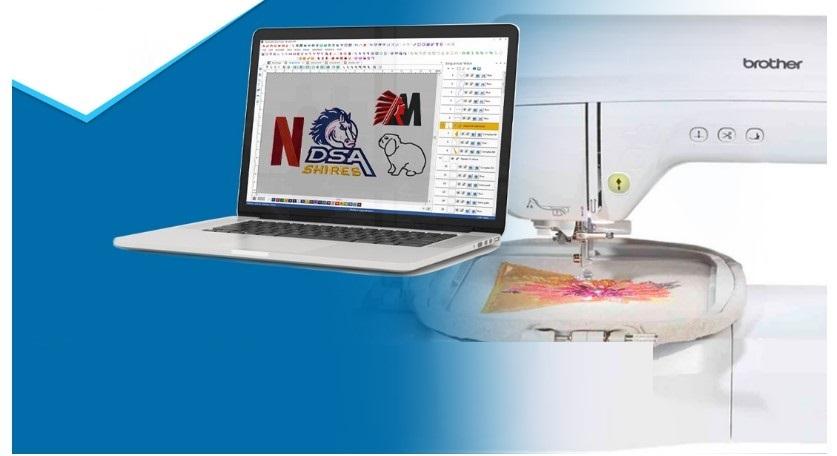
To convert an image to PES embroidery format, you need to transform the artwork into a design that contains stitch instructions. This process is called embroidery digitizing. It helps your machine understand where to place stitches, which directions to follow, and when to change thread colors.
Whether you are a beginner, a home embroidery user, or a small business owner, this guide will walk you through the process. You will learn how to prepare your image, create a PES embroidery file, avoid common mistakes, and improve the quality of your finished design.
What Is PES Embroidery Format?
PES is an embroidery file format used by compatible embroidery machines. It stores stitch information that helps a machine sew a design onto fabric.
Unlike a regular image, a PES file contains instructions for stitching shapes, letters, outlines, and other design elements. Depending on the software and file version, it may also include thread color information and other embroidery details.
For example, a PNG image of a company logo may show blue text and a red symbol. To embroider that logo, the artwork must be converted into stitch objects that tell the machine how to sew the text and symbol.
This is why image-to-PES conversion involves more than changing a file extension. The artwork must be digitized into a usable embroidery design.
Why Convert an Image to PES Embroidery Format?
Converting an image into a PES file allows you to use custom artwork for many embroidery projects.
Here are some common uses:
-
Business branding: Add logos to uniforms, work shirts, and promotional clothing.
-
Personalized gifts: Stitch names, initials, or custom designs onto towels and bags.
-
Fashion projects: Create embroidered details for jackets, shirts, and accessories.
-
Small business products: Prepare designs for custom orders and handmade products.
-
Team apparel: Add club symbols, team names, and other artwork to clothing.
A properly digitized design can help create smooth outlines, readable lettering, and even stitch coverage. The final quality also depends on fabric choice, stabilizer, thread, needle, and machine settings.
What Is the Difference Between an Image File and a PES File?
Before you convert an image to PES embroidery format, it helps to understand how these file types differ.
| File type | Main purpose |
|---|---|
| JPG | Stores photographs and other images |
| PNG | Stores images and supports transparent backgrounds |
| SVG | Stores scalable vector artwork |
| Can contain artwork, text, and other page content | |
| PES | Stores embroidery design information for compatible machines |
Image files describe how artwork should look on a screen or page. Embroidery files provide information needed to stitch the design.
A clear image is a good starting point, but it does not automatically contain the stitch paths, stitch types, or settings needed for embroidery.
How to Convert an Image to PES Embroidery Format
The conversion process usually involves preparing the artwork, digitizing it, checking the stitch design, and exporting the final file.
Step 1: Choose a Clear Image
Start with the best version of your artwork. A high-quality logo or illustration is usually easier to digitize than a blurry image with unclear edges.
Suitable starting files may include PNG, JPG, SVG, or other formats supported by your software.
For the best results, look for:
-
Clear outlines and shapes.
-
Readable text.
-
Distinct color areas.
-
Minimal unnecessary details.
-
Good contrast between the design and its background.
For example, a simple logo with two solid colors is often easier to digitize than a photograph with shadows, gradients, and many tiny details.
Step 2: Clean Up the Artwork
Before digitizing, remove unwanted backgrounds and fix rough edges where needed. Simplify details that may be too small to stitch clearly.
If your logo contains thin lines or tiny letters, consider adjusting the artwork to make those elements more suitable for embroidery.
Remember that thread cannot reproduce every detail of a digital image. Sometimes, a simpler design produces a cleaner and more recognizable embroidered result.
Step 3: Import the Image into Embroidery Software
Open compatible embroidery digitizing software and import your prepared artwork.
The image will usually serve as a reference for creating the embroidery design. Some programs offer automatic digitizing tools, while others let you create stitch objects manually.
At this stage, your image is not yet a complete PES file. You still need to define how each part of the design will be stitched.
Step 4: Digitize the Artwork
Digitizing is the process of turning visual artwork into embroidery stitches. This step has a major impact on the quality of the finished design.
The digitizer chooses stitch types, directions, density, and sewing order based on the artwork and intended fabric.
Common stitch types include:
Satin stitches: These are often used for lettering, narrow shapes, and borders.
Fill stitches: These cover larger areas, such as the main body of a logo or a broad design element.
Running stitches: These work well for fine lines, light outlines, and simple details.
The correct stitch type depends on the size and shape of each element. A good digitizing plan also considers underlay, pull compensation, and the order in which the machine will sew different sections.
Step 5: Set Thread Colors and Stitch Order
Choose thread colors that match the original artwork as closely as possible. Your exact choices may depend on the thread shades available for your project.
Next, arrange the stitch sequence so the machine can sew the design in a practical order. A well-planned sequence can reduce unnecessary thread changes and long jump stitches.
Keep in mind that screen colors may differ from actual thread colors. If accurate branding is important, compare the design with physical thread samples.
Step 6: Adjust the Design for Size and Fabric
A design that looks good on a computer screen may not stitch well at its intended size. Fabric can stretch, thread can pull, and small details may close up during stitching.
Review these settings before exporting:
-
Stitch density: Avoid excessive density that can make the design stiff or damage the fabric.
-
Underlay: Add suitable foundation stitches to support the top stitching.
-
Pull compensation: Account for the way fabric and thread can affect finished shapes.
-
Lettering size: Make sure text remains readable after stitching.
-
Stitch direction: Choose directions that support the appearance and coverage of each area.
For example, a logo intended for a lightweight polo shirt may require different settings from a design stitched onto a thick jacket.
Step 7: Preview and Test the Design
Use the software's stitch preview or simulator to inspect the embroidery design before saving it.
Check for gaps, excessive stitches, awkward jumps, uneven coverage, and unnecessary color changes. Confirm that the design dimensions fit within your machine's embroidery area.
If possible, run a test stitch on fabric similar to your final material. A sample can reveal problems that may not be obvious on the screen.
Step 8: Export the Design as a PES File
When the embroidery design is ready, use the software's save or export option and select PES format.
Choose a clear file name and save the design in a folder where you can find it easily. If the program offers several embroidery formats, make sure you select PES rather than an image format or another machine format.
After exporting, reopen the file if your software allows it. Check the design size, stitch sequence, and thread colors to confirm that the saved version is correct.
Step 9: Transfer the PES File to Your Machine
Follow your embroidery machine's instructions for transferring designs. Depending on the model, you may be able to use a USB drive or another supported method.
Load the file and confirm that the machine recognizes the design. Check its placement and dimensions before starting the embroidery process.
Never assume that a file will work simply because it has a PES extension. The file must be properly created and compatible with your machine.
Can You Convert an Image to PES Format Online?
Some online services and embroidery tools offer image conversion or digitizing features. These can be convenient when you do not want to install software on your computer.
However, it is important to understand what the service actually does. A tool that changes an image file into another file type is not necessarily creating a proper embroidery design.
Look for a service that supports embroidery digitizing, not just image conversion. It should allow you to create or adjust stitch information and export a usable PES file.
For logos with fine lettering, complex shapes, or multiple colors, professional digitizing may produce better results than an automatic online converter.
Common Problems When Converting Images to PES
Even when you follow the correct steps, some issues can affect the final embroidery. Understanding these problems will help you avoid wasted time and materials.
1. The Design Looks Blurry or Uneven
This can happen when the original artwork is low quality or the stitch paths do not follow the shape correctly.
How to fix it: Start with clearer artwork, simplify rough details, and review the digitized outlines before exporting the file.
2. Small Text Is Difficult to Read
Very small letters can become crowded when stitched. Thin lines and narrow spaces may disappear as the thread fills the design.
How to fix it: Increase the lettering size when possible, adjust the spacing, and choose an appropriate stitch type. Small text may need special digitizing techniques.
3. The Fabric Puckers
Puckering can result from several factors, including excessive stitch density, poor stabilization, unsuitable tension, or incorrect hooping.
How to fix it: Use an appropriate stabilizer, hoop the fabric correctly, and review the design settings. Test the design before stitching the final garment.
4. Thread Breaks During Stitching
Thread breaks may be caused by excessive density, poor thread quality, a damaged needle, incorrect tension, or other machine-related issues.
How to fix it: Check the machine setup and inspect the design for unnecessary stitches or overly dense areas. A properly digitized file can help, but machine maintenance also matters.
5. The PES File Will Not Open
A file may fail to open because it was exported incorrectly, became damaged, or is not compatible with the machine or software.
How to fix it: Confirm the required format and supported file version in your machine's documentation. Export the design again if needed and follow the recommended transfer process.
Is Automatic Image-to-PES Conversion Good Enough?
Automatic digitizing tools can be useful for simple shapes and basic artwork. They may help beginners create an initial design without manually placing every stitch.
However, automatic conversion can struggle with complex logos, tiny lettering, overlapping shapes, and areas that need special stitch directions. It may also create unnecessary stitches or uneven coverage.
Think of automatic digitizing as a starting point rather than a guarantee of a finished design. Review the stitch preview and make corrections before using the file.
For designs that need to look consistent across several garments, manual adjustments or professional digitizing may be worth the extra effort.
DIY Conversion vs. Professional PES Digitizing
Creating a PES file yourself can be a good choice if you have suitable software, time to learn, and a simple design.
Professional digitizing may be more useful when the artwork contains fine details, small text, or complex shapes. It can also help businesses that need repeatable results for customer orders or branded clothing.
When Should You Choose Professional Help?
Consider professional digitizing if:
-
You need a clean logo for business uniforms or promotional products.
-
Your design contains small text or intricate artwork.
-
Your test stitching shows gaps, puckering, or uneven coverage.
-
You are unsure how to adjust density, underlay, or pull compensation.
-
You need a design prepared for a specific fabric and embroidery size.
Digitizing Buddy can help prepare artwork for embroidery with attention to stitch quality, design details, and machine requirements. When requesting a PES file, provide your original image, desired dimensions, fabric type, and any special instructions.
These details help the digitizing process match the needs of your project.
Tips for Better Image-to-PES Conversion Results
A few practical steps can make the process easier and improve the finished embroidery.
-
Use clean artwork: Clear edges make shapes easier to digitize.
-
Keep the design suitable for embroidery: Simplify gradients and tiny details where necessary.
-
Choose the correct size: Design for the actual space available on the garment.
-
Check stitch density: Too many stitches can affect comfort and fabric quality.
-
Use the right stabilizer: Match the stabilizer to the fabric and design.
-
Preview before exporting: Look for gaps, unnecessary jumps, and color sequence problems.
-
Test before production: Stitch a sample before using expensive or finished items.
-
Save your working files: Keep the original artwork and editable embroidery project so you can make changes later.
Following these tips can help reduce errors and produce a more consistent result.
Conclusion
Learning to convert an image to PES embroidery format opens up many possibilities for custom clothing, business branding, personalized gifts, and creative projects. The most important step is understanding that embroidery conversion requires stitch information, not just a change in file extension.
Start with clear artwork, digitize it using suitable stitch types, adjust the design for the fabric, and review the finished file before transferring it to your machine. A test stitch can help you identify issues before they affect your final product.
If you need a professional result or want to avoid common digitizing problems, Digitizing Buddy can help you prepare your artwork for embroidery. With careful preparation and proper digitizing, you can turn a simple image into a design that is ready for stitching.
FAQs: Convert an Image to PES Embroidery Format
1. How do I convert an image to PES embroidery format?
Import your image into compatible embroidery digitizing software, create stitch objects, adjust the design, and export it as a PES file. Preview and test the design before stitching your final item.
2. Can I convert a JPG or PNG image to PES?
Yes. JPG and PNG images can serve as starting artwork in compatible embroidery software. However, the artwork must be digitized into stitches before it becomes a usable PES embroidery file.
3. Can I convert an image to PES format for free?
Some software offers free tools or limited digitizing features. Whether you can complete the process without paying depends on the software and the complexity of your design. Manual digitizing may require practice.
4. Why does my PES design look different from the original image?
Embroidery uses thread instead of pixels, so gradients, thin lines, and tiny details may not look exactly the same. Good digitizing, suitable stitch settings, and test stitching can improve the result.
5. Can I use any PES file on my embroidery machine?
Not necessarily. Compatibility depends on the machine model, supported file version, design dimensions, and other limitations. Check your machine's manual before transferring or stitching the design.

 English
 Arabic
 French
 Spanish
 Portuguese
 Deutsch
 Turkish
 Dutch
Dutch
 Italiano
 Russian
 Romaian
 Portuguese (Brazil)